HoneyPot running off a Pi Zero W
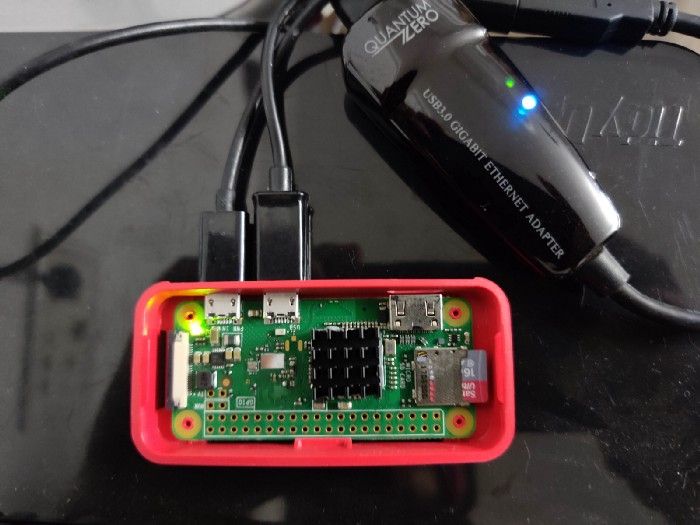
I had a Pi Zero W lying around my stuff. My original aim was to run a camera on top of it, but it seemed that Pi 3 handled the video processing much better than this tiny guy, so it was left off. I also got bored running Aircrack attacks.
Sometime ago, I got this new internet connection from BSNL, which is well not a very good ISP, but does give me a public IP. This was a new thing, as in India most ISPs only provide you a NAT access and no public IPs. So I disabled CWMP and all the things I could on my router, but I also remembered how my servers are constantly hammered by random requests from script junkies. I thought, what if, I could make this tiny guy a honey pot? And long story short, it works flawlessly! We’re approaching 500K attacks in less than 3 months!
Setup
connected a USB LAN dongle (even the WiFi will do, however this is more reliable and I had one lying around) to Pi Zero W. I initially started with 16 GB microSD card, but kept running into issues with space and hence finally decided to use a 64 GB card. I flashed Kali onto this card, created a headless setup, and SSHed into it.
Next thing was to setup Cowrie. Cowrie is a great honeypot implementation, which allows us to host a fake FTP or SSH server (and so much more), while giving us ton of output plugins like log files, JSON files, and even dumping the data to a MySQL instance. And an awesome thing about that is, that you can get a dashboard like above in Grafana on top of that MySQL instance quite easily.
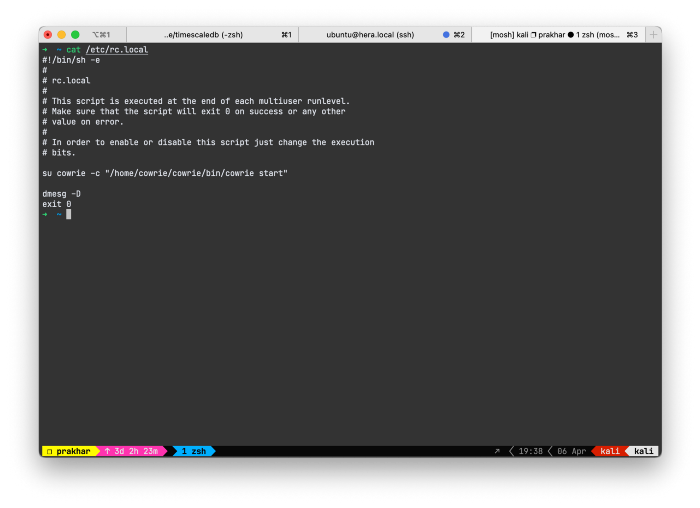
I used this amazing guide by David French with some more tweaks, like instead of handling routing in the device itself, I avoided it since I didnt need it. Also I added the service to device’s /etc/rc.local:
su cowrie -c "/home/cowrie/cowrie/bin/cowrie start"
This finally looks like:
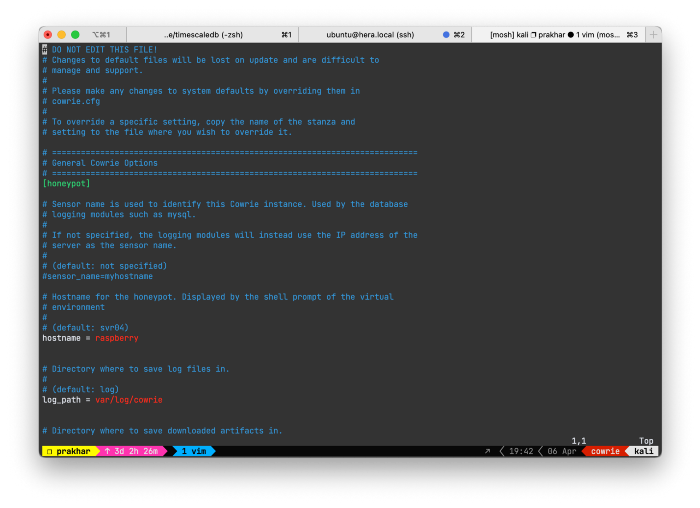
Then we can also edit etc/cowrie/cowrie.cfg to enable output plugins, which in my case was mysql. You’ll also need to create the schema for the MySQL plugin, which is mentioned here.
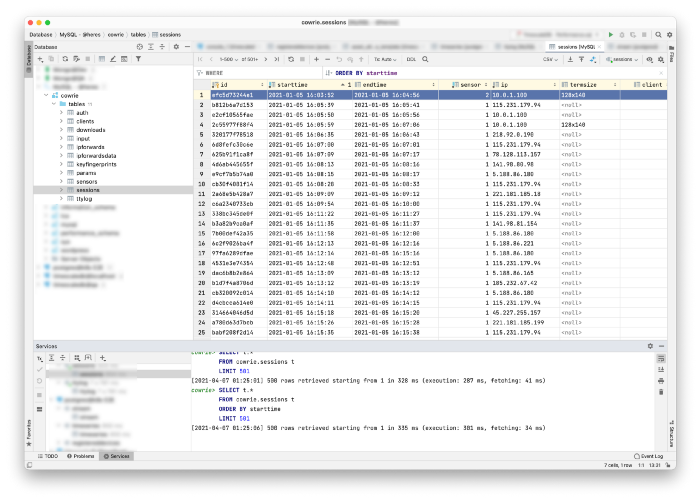
Finally, we need to verify is everything is working fine. Assuming you’ve already started the server and tried to connect to it once, you’ll find an entry in the database. Here is the very first entry in the database, which belongs to my first try to hit the honeypot.
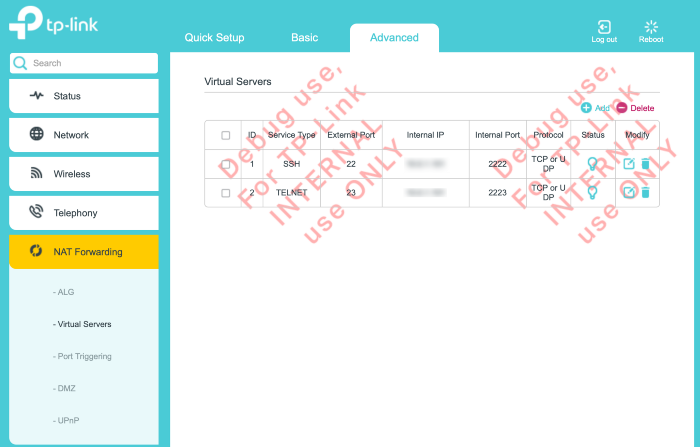
Now we need to forward the incoming requests on the router, to this little guy. We do this via Virtual Server in my TP-Link router, provided by the ISP. It’ll look something like this. You’ll need to mention the IP allocated to the Pi. I recommend that you allocate a static IP using Static leases in DHCP server, but you can also use static configuration inside Kali as well.
After this you should be able to hit your Pi HoneyPot from any IP. Get your public IP and try doing that while on another network, let’s say a mobile hotspot, and things should move smoothly. If not, confirm whether your ISP actually provides you with a public IP or not. This can be verified by matching what IP the router shows it has vs what Google says when you search for “what is my ip”.
Finally for the Grafana Dashboard, you’ll need to setup a datasource. MySQL is natively supported and can be easily added. Here is my gist for it. My datasource’s name is “Mysql — Cowrie”.
There are some tables, which lack a time column, and hence you’ll only get complete totals and not over the time range selected on the dashboard, but that seemed fine to me.
Let me know what do you guys think about it. In future I’ll dive more into what sort of malware we can capture from this.